It’s frustrating when you press a switch only to find that the LED strip lights are not turning on.
Generally, you may assume that the strip is faulty and needs repair or replacement, which is not always the case.
In some circumstances, the problem lies with the power supply, accessories, or even connectors.
In others, it may be that you are overloading your power supply leaving little to no power for your LED strip.
Regardless, we’ve got all you need to know about LED strip lights not turning on.
Additionally, we have the steps you should take to solve the issue. Let’s get going.
Diagnosing LED Strip Lights That Won’t Light Up
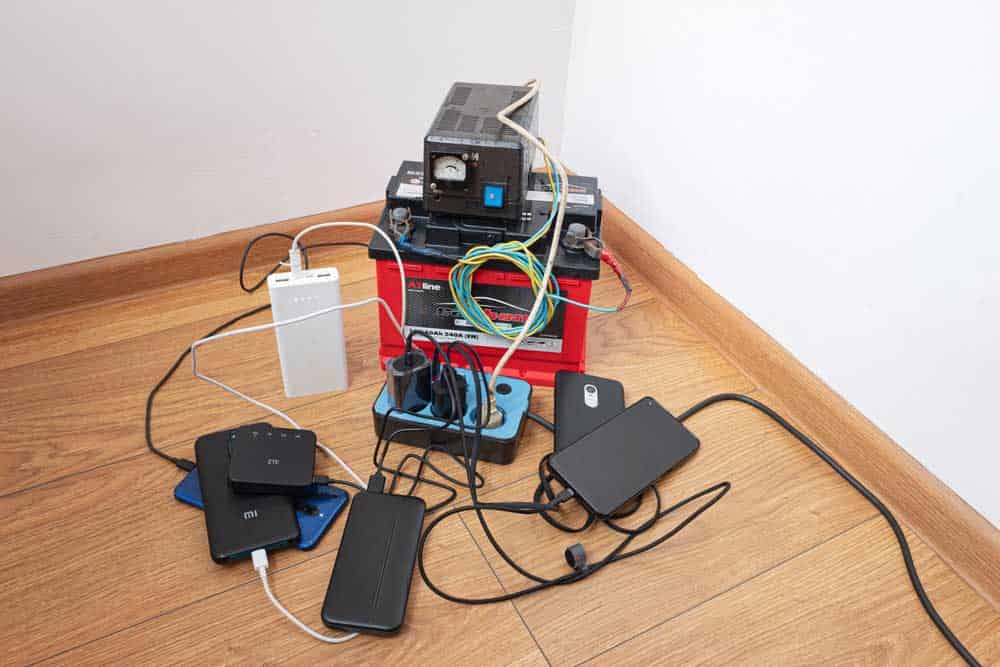
(Using a 12V battery to charge multiple electronic devices)
Two main reasons are why your LED strip lights won’t light up.
First, it may be that power is not reaching the LEDs due to a faulty power supply.
Or second, the LEDs or connectors are broken and may need soldering or replacement.
Therefore, you need to diagnose the fault before attempting any repairs.
Check the Power Source
The power source is the grid that provides the voltage and current your LEDs operate on.
Generally, if the whole length of LEDs on your strip doesn’t work, chances are high that there’s a missing link between the source and the electrical load.
First, use a multimeter or a voltage tester to detect the amount of voltage coming out of your battery.
In some cases, the battery is flat hence unable to power the LEDs.
If you power your LEDs directly from the mains grid through a converter, you may as well check to see if there’s power in the socket.
Afterward, if you detect power from both sources, the problem lies elsewhere.
Test Voltage Levels

(Measuring AC voltage using a digital multimeter)
LEDs operate on either 12 or 24V, depending on the strip’s current requirements.
Suppose your LEDs won’t turn on; use a DC volt meter to test voltage levels reaching your light strips.
Moreover, if you draw AC power from the mains, you can also measure voltage from the converters like the transformer or driver.
In both cases, the two convert alternating current to direct current that the LEDs can use.
Additionally, when you find the voltage satisfactory, the problems may be elsewhere.
Check the Connections
The next step you’ll take is checking the connections with more interest in the solderless connector.
At this stage, use a multimeter to check the voltage or continuity at common intervals along the LED strip.
Doing so lets you know the length of the strip that disconnects the LEDs from the power supply.
Moreover, check for short circuits when the positive and negative terminals come into contact.
Check the Accessories
Inspect all accessories, such as dimmers, to ensure they are compatible with your LED system.
A simple way to do so is by disconnecting one accessory after the other and checking whether the LEDs turn on without it.
Solutions to Common Problems With LED Strip Lights
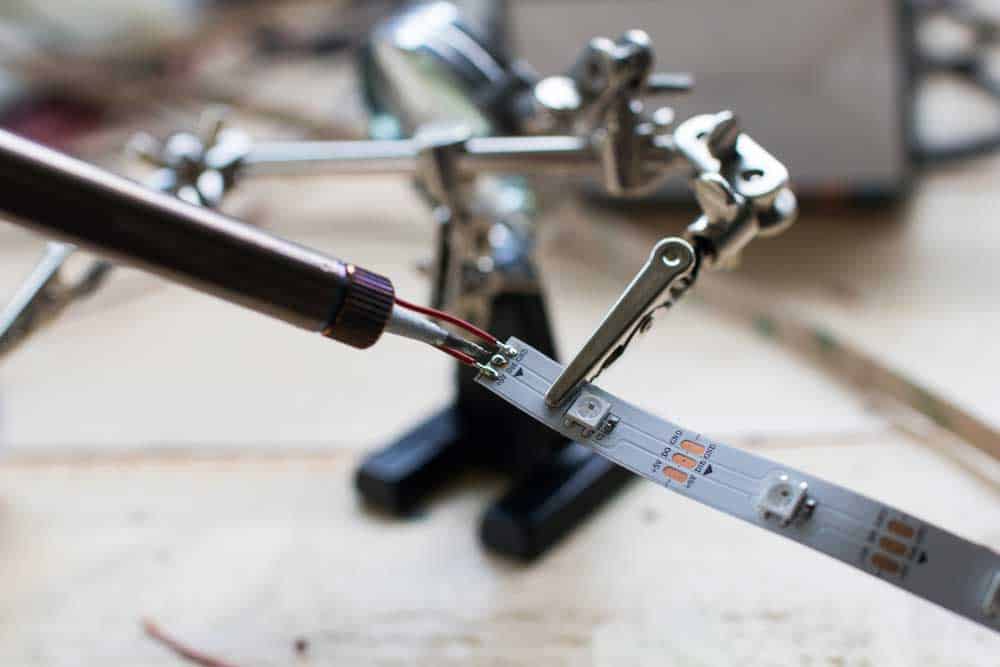
(Welding connections onto the ends of an LED strip)
Most LED problems are solvable after a correct diagnosis. This section delves into the solutions to common LED problems.
Lights Dim Towards the Ends Of the Strip
LEDs strips that get dimmer towards the end signify a voltage drop.
In other words, if you install a 10-foot LED strip that needs 5 watts per foot, you’ll need a total wattage of 50 watts.
Now, the LEDs will light dimmer if your power source supplies anything less than 50 watts.
The solution is adding another power source to increase the available wattage.
Lights Turn On and Off
The solution to flickering LEDs is replacing your power supply with a stable one.
Alternatively, use a voltage regulator to stabilize the voltage reaching your LEDs.
A Section of the LED Strip is Dim
If a section of the LED strip is dim, you are using cables that are too thin that they cause significant voltage drops.
Consequently, using the right wire gauge for your LEDs is the solution.
Alternatively, keep the wire running short to avoid excessive voltage drops.
Damaged Sections
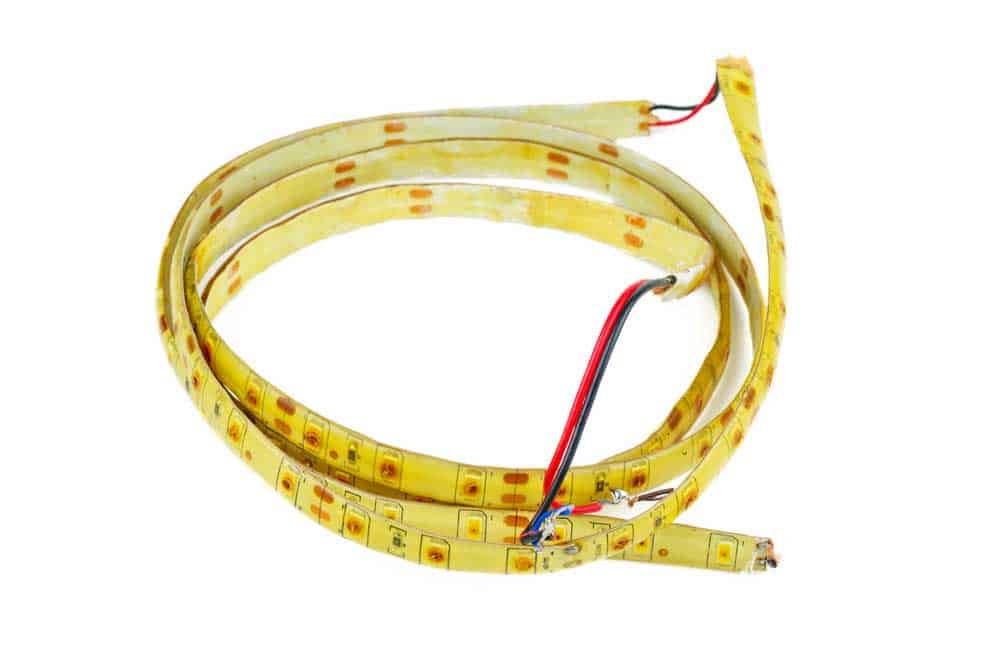
(A burned LED strip lights)
The solution is to remove the damaged section and replace it with solderless connectors.
If it is a burnt LED, just desolder the connections and solder in a new one, and you are good to go.
However, if a large section of the LED is burnt, you should first troubleshoot to know the cause of the damage.
Failure to do so means that you’ll be exposing the replacement components to the same hazards.
FAQs
Should I seek professional help for LED strip light repairs?
Seek professional help if the LED strip light damages are too complex that you cannot solve them alone.
Additionally, do so if you lack the appropriate tools to execute the repair job.
You may also benefit from insurance that covers the workers for accidents or extra damages.
Furthermore, the more you repair LED strip lights, the faster and more accurate you get.
Professionals are better skilled and can complete a job with higher accuracy.
Are there any preventive measures to avoid LED strip light failure?
Yes. You can take several preventive measures to prevent your LED strip light from failing.
First, shield them from exposure to moisture or water if they lack IP67 or IP68 waterproof ratings.
However, if you can’t do so, it’s best to use water-resistant LED strips in damp environments. Second, supply your LED strip light with a suitable power supply.
For instance, supply a 12V LED with a power supply providing a similar value.
If you supply a higher voltage, you’ll increase the chances of your LED strip light failing.
Third, use a surge protector or a voltage stabilizer to prevent voltage fluctuations that may damage the LEDs.
Fourth, buy only quality LED strips that last you for more than 50,000 service hours.
You will have yourself to blame when you buy low-quality ones that last less long.
Fifth, ensure you install your LED strip lights well and according to the manufacturer’s recommendation.
It is especially the case if the installation involves bending and twisting that may damage the internal circuitry.
Sixth, install your LED strips in locations with adequate ventilation since covering them with materials that trap heat degrades them.
How can I check if the power supply is the problem?
Sometimes, the power supply may cause LED strip lights to fail.
To diagnose the problem, ensure the LED strips have all connectors, adapters, and power cords in the right position.
Moreover, use a multimeter to measure the voltage output from the power supply.
Generally, the value you’ll get shall be close to its capacity, meaning that any major deviations signify that the power supply is faulty.
Furthermore, inspect the power supply for any visible signs of damage, like bulging capacitors and burnt wires.
Lastly, if you don’t find any problems with the power supply unit, substitute it with a similar rating.
Suppose your LEDs operate as they should; you would then be sure the other power supply unit needs replacement.
Conclusion
Several factors make LED lights not come on. Luckily, most are solvable with the right tools, materials, and skills.
And, if you don’t, we recommend consulting a professional who shall diagnose and repair it for you at a fee.
However, if you are repairing an extensive section of the LED strip, we recommend weighing between doing so and buying a new one.
LEDs are generally inexpensive despite lasting more than 50,000 hours, with high-quality ones reaching 100,000.